A handwired ergonomic keyboard
21.06.2020 PermalinkIn a recent post I explained how QMKs Mod-Tap feature helps me to keep my fingers on the home row, which finally enabled me to use touch typing for software development where I often have to use keyboard shortcuts involving one or more modifiers.
QMK with its multi layer support is a game changer insofar as your keyboard becomes like a stack of blank sheets upon which you can draw your keys just the way they fit your needs. However, there is an obvious limit. The physical placement of keys can not be changed like software. Just look at how the fingers of your left hand are supposed to travel across the keys:

While the fingers of your right hand can move in an almost natural way, you have to twist your left hand and its fingers in order to reach the keys as intended. In other words, the classical arrangement of keys isn't ideal for human hands.
Split keyboards are a consequential answer to this problem, and since I was in the middle of rethinking how I like one of my most important tools to be, I decided to search for a different layout.
The Atreus 42 is an open-source split keyboard in one piece with two panels, one for each hand, designed by Phil Hagelberg who is also the original author of Leiningen, Clojure's build tool. It is ultra compact and can even be used on your lap while sitting on the couch. It is sold by Keyboardio and FalbaTech. There is also a 62 key version, with a row dedicated to all the modifiers plus a dedicated number row, but since I'm fine with the Mod-Tap way of QMK, I wanted something in between.
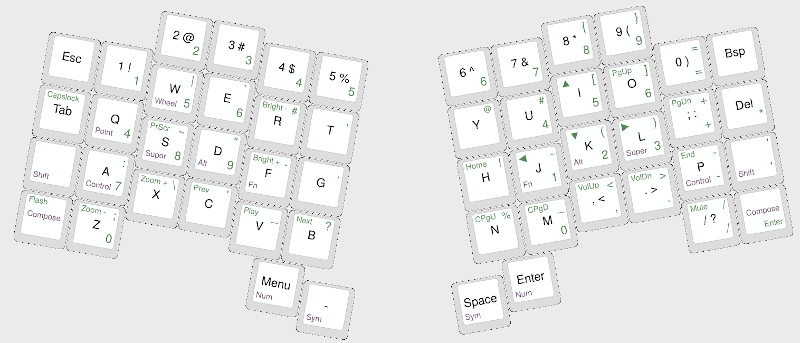
There's a nice online tool for drawing realistic keyboard layouts, so I created some drafts. I printed my drafts on sheets of paper to get an impression of how the layout would fit my hands. And this is the layout I finally came up with:
Ok, a nice vision, but how can I realize the necessary piece of hardware?
When building a custom mechanical keyboard you typically need to have theses parts in place:
- A case, including the plate where the switches are mounted
- Switches
- PCB (printed circuit board, carrying the micro processor)
- Diodes, one for each switch
- Keycaps
- Stabilizers (not for my design because all keys are 1U size)
- USB cable
It took some time and patience until I had everything in place that I needed to create an Atreus like keyboard on my own.
The case
The Atreus was initially developed as a DIY kit, so it has a DIY friendly sandwich design, that is, the keyboard is assembled by mounting a number of laser-cut plates. With this idea in mind I started to draw sketches using Inkscape. Here are the 5 plates of the final version:
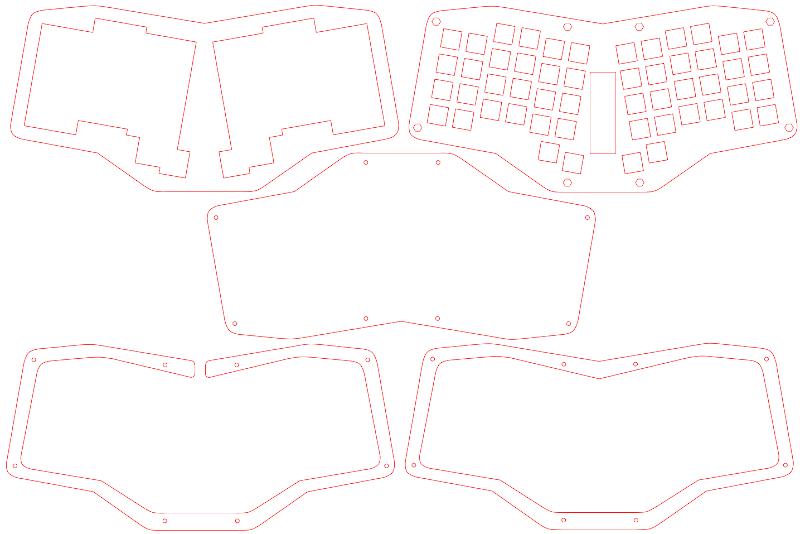
Note that the drawings have to be really clean since they repesent the path for the laser, i.e. they should not contain razor sharp corners or duplicated lines. Please find my design files, my QMK keymap and other source files on GitHub.
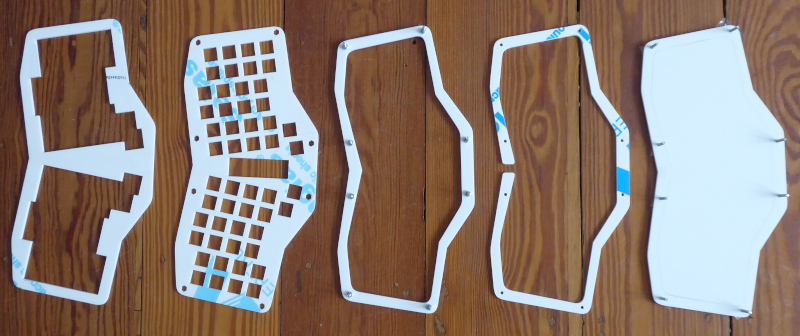
After some search for a laser cutting service in Germany I found cutcraft, which provide an excellent and friendly service. I ordered all plates to be cut from a 3mm acryl glass. And here's what I received:
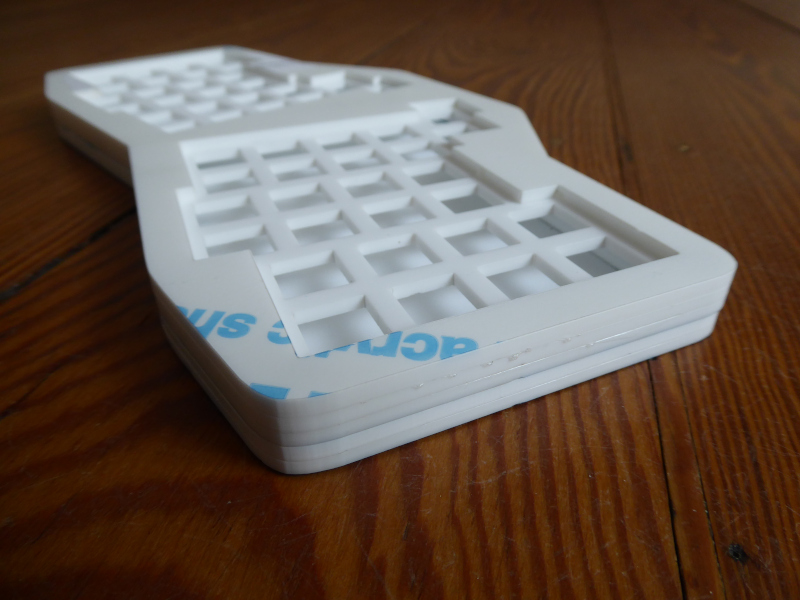
I used acryl glue and 8 pairs of screws and nuts to assemble the case:
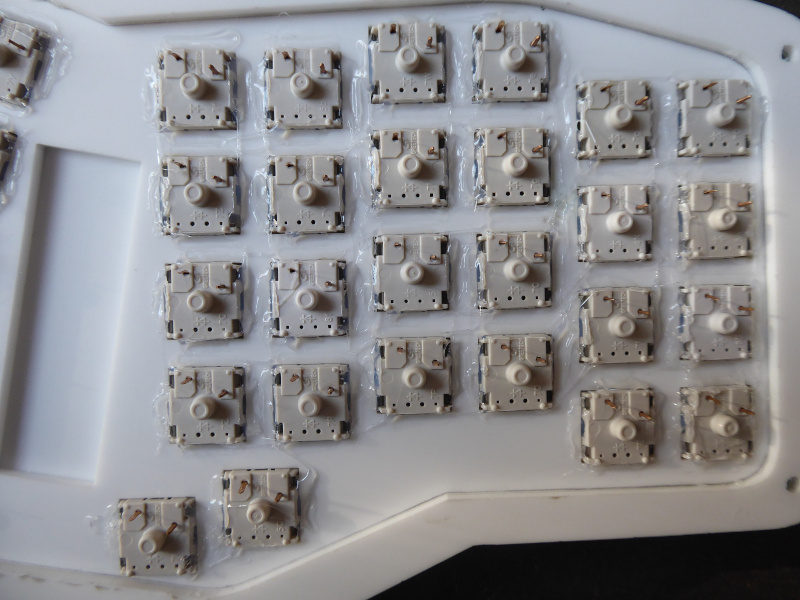
The switches
I used 52 stock Greetech Brown switches which are comparable to Cherry MX Brown switches. They feel a bit more tactile and unfortunately also more scratchy despite lubing them.
I had to use hot glue to properly fix the switches to the plate.
Handwiring instead of a PCB
The electronic heart of a keyboard is usually a PCB (printed circuit board, hosting the controller) but I wanted to avoid learning on how to design a PCB on my own, since I had no plans to sell any number of the keyboards I might eventually build for myself. So the overhead would perhaps not pay off. The alternative is handwiring. The prerequisite is to understand how the controller uses a matrix to scan many more switches than there are inputs on the controller. For the practical part of creating the matrix on your own with only wires and diodes, I found help in existing guides like this one that explain how to approach the work. It is obvious that handwiring takes more time, I estimate about 4 hours compared to 1 hour for soldering the required switches onto a PCB. But after all it is a hobby to build a personal piece of hardware, not a competitive race, so I enjoyed to spend more time on it.
Soldering the rows and columns, including diodes, is very straight forward, and the result looked quite clean:

The controller I used is a tiny board called Pro Micro, including the ATmega32U4, which is available for just a few Euros. Connecting the rows and columns with the Pro Micro also requires considerable work, and the result didn't look as clean:
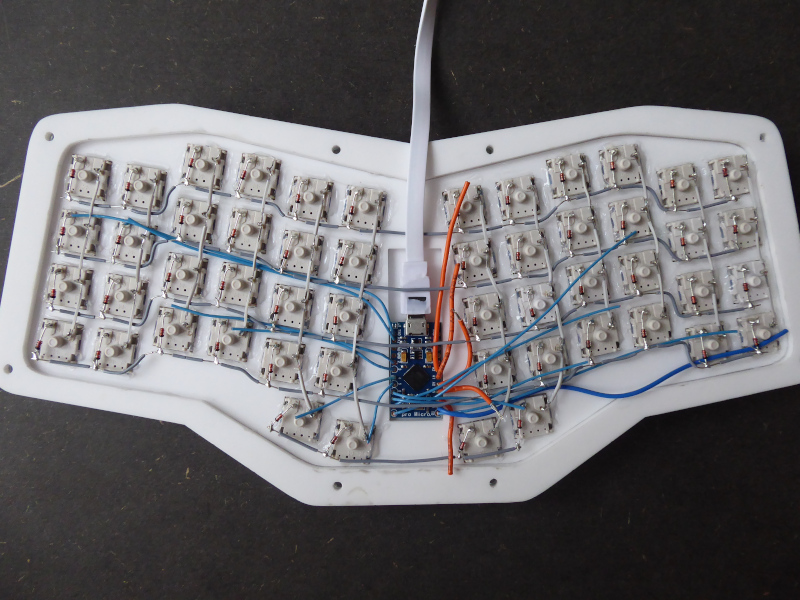
Although a handwired board might look a bit fragile compared to a PCB based board the soldered connections are quite solid, so I have no doubt about the longevity of the product.
The finish
After soldering I used a multimeter to check every single connection. I connected my PC with the controller using a USB cable. Then I had to flash the firmware to the controller using the QMK tooling and a jumper-like cable to short circuit the controllers RST with the GND pin twice. The final step was to close the case with the screws and put on colorful keycaps and a unicorn sticker that my daughter gave me:
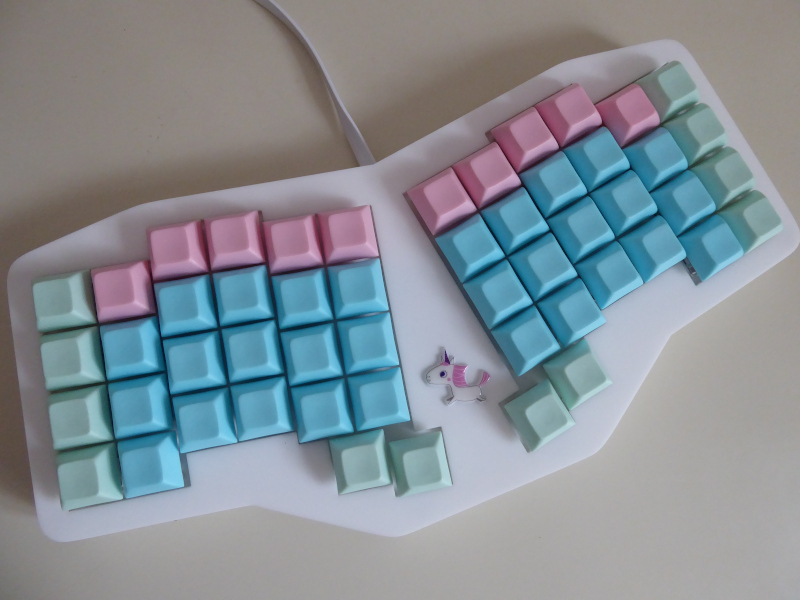
I am quite pleased with the outcome. The keyboard with all parts weighs about 500 grams, its size is 29cm x 14cm. The sound is muted, and the acrylic plate that holds the switches is flexible but not bouncy.
The hard part
Then came the strenuous phase of training my fingers to find the right keys with an acceptable speed. The first three days required a large amount of energy and frustration tolerance but I made enough progress to keep me motivated. This became much better after about a week. Working on such a keyboard feels totally different compared to a classical layout because my hands always stay in the same position. I can reach every key just by bending or stretching my fingers. It took some practise to master the additional layers (for nav functions, numbers, symbols, umlaut composition, mouse pointer, mouse wheel) but this is getting better every day.
The project was quite satisfying, and perhaps I will try another build with a different type of switch and other case material like wood.